Monday, October 8, 2012

Vertical Stripe Scarf

Recently I realized that even though I have been crocheting since the beginning of this year, I had yet to make something for myself. Back in March I'd gotten some yarn from a local yarn shop intending to make a scarf for myself, and since it's already gotten below 32 degrees multiple nights, I decided to finally make it.


I decided to do something different and work this scarf lengthwise. Definitely a good decision, because I am very happy with the result.

The yarn I used was a lighter weight (about a 3) but I still used an I size crochet hook. To start the scarf I chained somewhere in the ballpark 200 stitches, although that could be easily adjusted. Next I turned and double crocheted one stitch per chain all the way across. This process is repeated for a total of 12 rows. Rows 1, 2, 11, and 12 are dark green (the foundation chain row does not count as row 1). Rows 3, 4, 9, and 10 are orange. Rows 5-8 are pale green.


To make a tassel I cut three strands of the yarn (approximately 10 inches each), folded them in half, and knotted them through the outermost stitch on the end of the scarf. I used one tassel per row on each end of the scarf.


I actually have a decent amount of yarn left from this project so hopefully after I learn a friend's basic beanie pattern I can make a matching hat!

Monday, September 3, 2012

Dinosaur!

Being a geologist means I LOVE Dinosaurs. A lot. I found this pattern (located here: http://amigurumibyknotty.blogspot.com/2010/05/longneck-dinosaur.html) for a long-neck dinosaur early on in my crocheting career, and I've been dying to make it ever since.


I finally did, and I am very pleased with the result! If any of you have been reading this blog you might notice that this is the same yarn used in Joy's birthday scarf. I used it in this pattern because this dinosaur is for a fellow geology undergrad who is graduating this year (I just got it done way ahead of time!). When I was working on the scarf she noticed it and decided she really liked the colors and the sparkle and so declared I should make her something with the extra, hence this dinosaur.


The reason one of his legs is purple is because I originally thought I wasn't going to have enough of the teal color. Turns out I did, but my friend decided she liked the idea of a purple prosthetic. (He got into a really intense fight with some raptors) My friend will have to careful though, or I might steal him for myself!

Isn't he too cute!?

Surprisingly, I managed to make this guy in about a week! I guess that's what happens when classes haven't started yet and you have free time...

Sunday, September 2, 2012

Hogwarts House Color Bracelets

Finally, finally, finally, I am proud to present my Hogwarts bracelets!


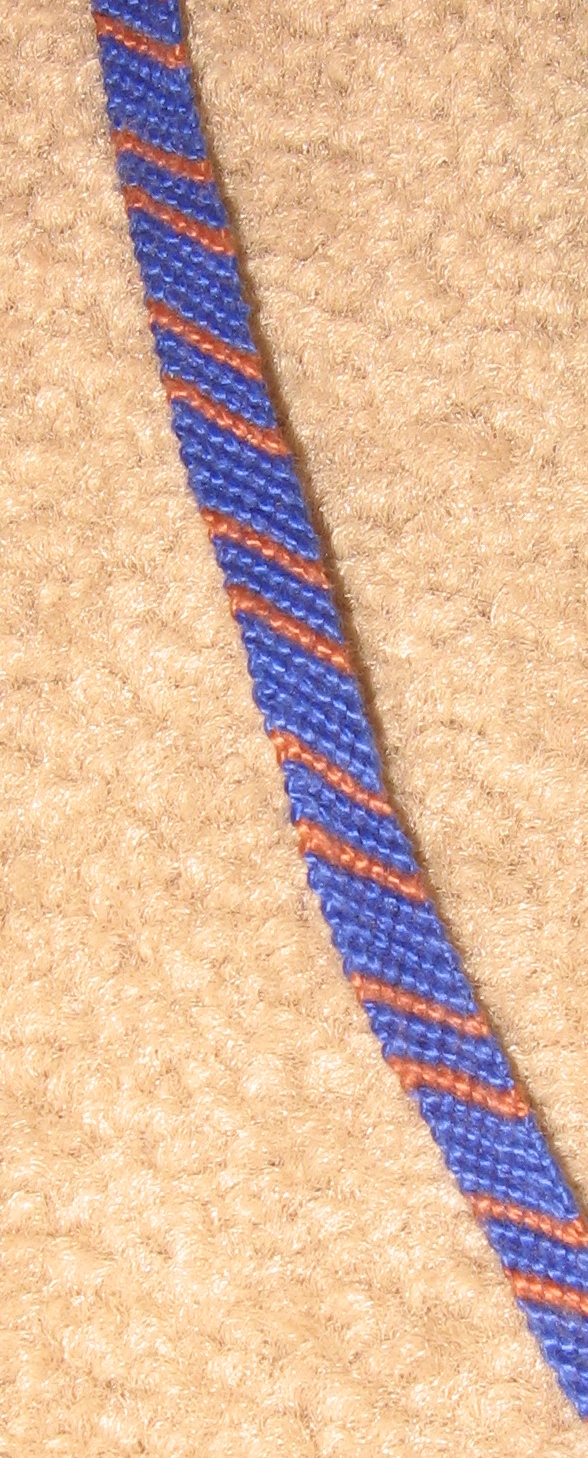
This is a very simple design and so they were not difficult to make, I just needed the idea. This is the standard flat friendship bracelet style. In the order of how you want the colors to appear in the bracelet you make two knots with the beginning string on each of the following strings from left to right and then repeat with the next string on the outermost left. That is a very bad explanation so here is a better tutorial of the basic idea: http://www.dltk-kids.com/crafts/friendship/mbracelets.htm

The bracelets were made with 4 strings folded in half to give us 8 pieces of string to knot with: 3 of the base color and 1 of the accent color. The pattern I used was: 2 rows base, 1 row accent, 2 rows base, 1 row  accent, 2 rows base (and repeat).

The following colors were used for the houses:

 Gryffindor: Scarlet and Gold

Ravenclaw: Blue and Bronze 

 Slytherin: Green and Silver

Hufflepuff: Yellow and Black

If there is any confusion (which I'm sure there will be) or if there are any questions, feel free to leave a comment and I will address it!

Thursday, August 16, 2012

Flower Beads

I was cleaning my room recently (I know, big shock!) and came across a bunch of old jewelry, including these anklets.


Now I've had these since I went to Mexico when I was in grade school and I always thought they were really cool so I thought, hey, maybe I should try to learn to make them.


Above is my first attempt! Pretty good I think, although a lot larger scale than the originals.


I figure it's initially easier to work with larger beads in order to fully understand the pattern. That way, when you have to work with seed beads you can actually know what's going on without straining your eyes too much!

I think that the larger flowers will probably become a key chain because I'm personally not that into chunky jewelry. I am working on a bracelet with this style right now and so I'll post that when I finish! And since this bracelet is pretty cool I'll try to write a pattern of sorts to share with y'all on the interwebs.

Update (8/20/12): Here's my completed seed-bead sized bracelet!

Full bracelet

Close-up of the pattern

Close-up of the clasp

A special thanks to my friend for whom this was made: she gave me all the materials! The beads were strung on beading wire and the clasp is a clip clasp (I believe that's correct). It took about 3 hours, but it takes less and less time as you get closer to the end. I would not recommend using beading wire though because it was very difficult to start the bracelet because the wire was too strong. I haven't had time to make a pattern yet, but I will put it up as soon as I have!


Button Bracelets

Long time no see! I promise during my long disappearance I continued to work on some small projects; get ready for several close-succession posts!

Over the summer I taught my three roommates to make friendship & hemp bracelets. One of them saw a bracelet on Pinterest that used a button as a center piece and challenged me to learn how to make it. Although I changed the style slightly, I really like the result. 


These are the two bracelets that I made for myself. Each bracelet uses three hemp strings through each hole. It is a little difficult to get all three through without having some fraying, but in the end the band looks nicer because piece you braid with has the same number of strings.


The most difficult part of the bracelet is definitely the knot at the end with the clasp button. For mine I ended up threading two of the strings in and out of the clasp button. Then, I tied the knot right underneath the button using all of the strings. It's important to tie the knot as close to the button as possible to keep the threads in the button from wearing out as fast.


Although I braided my bands there are a lot more options. My roommate knotted the band of one of her bracelets like you would a friendship bracelet, so there's lots of room for experimenting! If anyone makes a button bracelet and creates a band a different way I'd love to see it!

Monday, June 4, 2012

Headbands Galore!

Woo-hoo, new project!

All colors and sizes!

Toning it down a little bit...Here are some lovely headbands that I made. I'm told they're fashionable by people that are, so I decided to trust them (I know literally nothing about fashion.) This was a very simple project, after I learned the double crochet stitch used in the pattern. Each headband took around 4 hours to complete, and that might be an over-exaggeration. This piece is made in two parts; the band and the knot.

 Here's a little closer shot of the knots.

I found the pattern for the headband here: http://allaboutami.tumblr.com/post/18110601640/knottedheadband

It was easy to follow, but I must crochet tighter than the author of the pattern because I had to use 75-80 chain stitches for the headband, and about 12 for the knot. Otherwise, I don't have too much to say about this project. I am, however, still working on my Hogwarts bracelets. I've finished Gryffindor, Ravenclaw is ten rows away from being done, and then it's just Hufflepuff and Slytherin left!

Wednesday, May 23, 2012

A DM's D20

First of all, sorry for the hiatus, I blame my finals (which is a pretty good excuse). Secondly, I have a new project to share!


Yay! This a crocheted 20-sided die, for those who aren't familiar with the nerdy vocabulary. I made this for boyfriend for his birthday (and I'm only two weeks late this time!). I used the pattern found here:


It's pretty decently sized as you can see by my hand. 

The triangles in the pattern are all made individually and then sewn together to make the die. I had no trouble with the triangles, but I would assemble them differently than given in the pattern. In the pattern it says to make four 5-sided pyramids and then connect them, however I found no geometrically possible way to do so (I'm sure I did something wrong.) So if you want to make this I would suggest making one of the pyramids and then connect all the pieces on individually after that, making sure each point is created by five triangles.


I used felt for the numbers on my die even though the picture with the pattern is shown with them sewn on. I did this mostly because I'm not overly wonderful with needle and thread. Plus it took about 5 minutes to hot-glue all of them on. 

Overall I had a lot of fun with this pattern, and even more fun laughing at all my friends who seemed entranced with my crocheting.
Related Posts Plugin for WordPress, Blogger...